Dice Contact Card - 2023
 Damage | Posted on
Ok, so maybe you received one of these from me and are confused. Hopefully I can clear that up! I figure the best way to talk about this is in an FAQ style.
Q: What IS this thing?
A: Well, first and foremost, it's a contact card which has info on how to reach me as well as some things I am interested in. I don't use the term "Business Card" because I am not offering services, products or selling anything other than my enthusiasm about electronics, flying, making, and other nerd stuff.
Q: What does it "Do"?
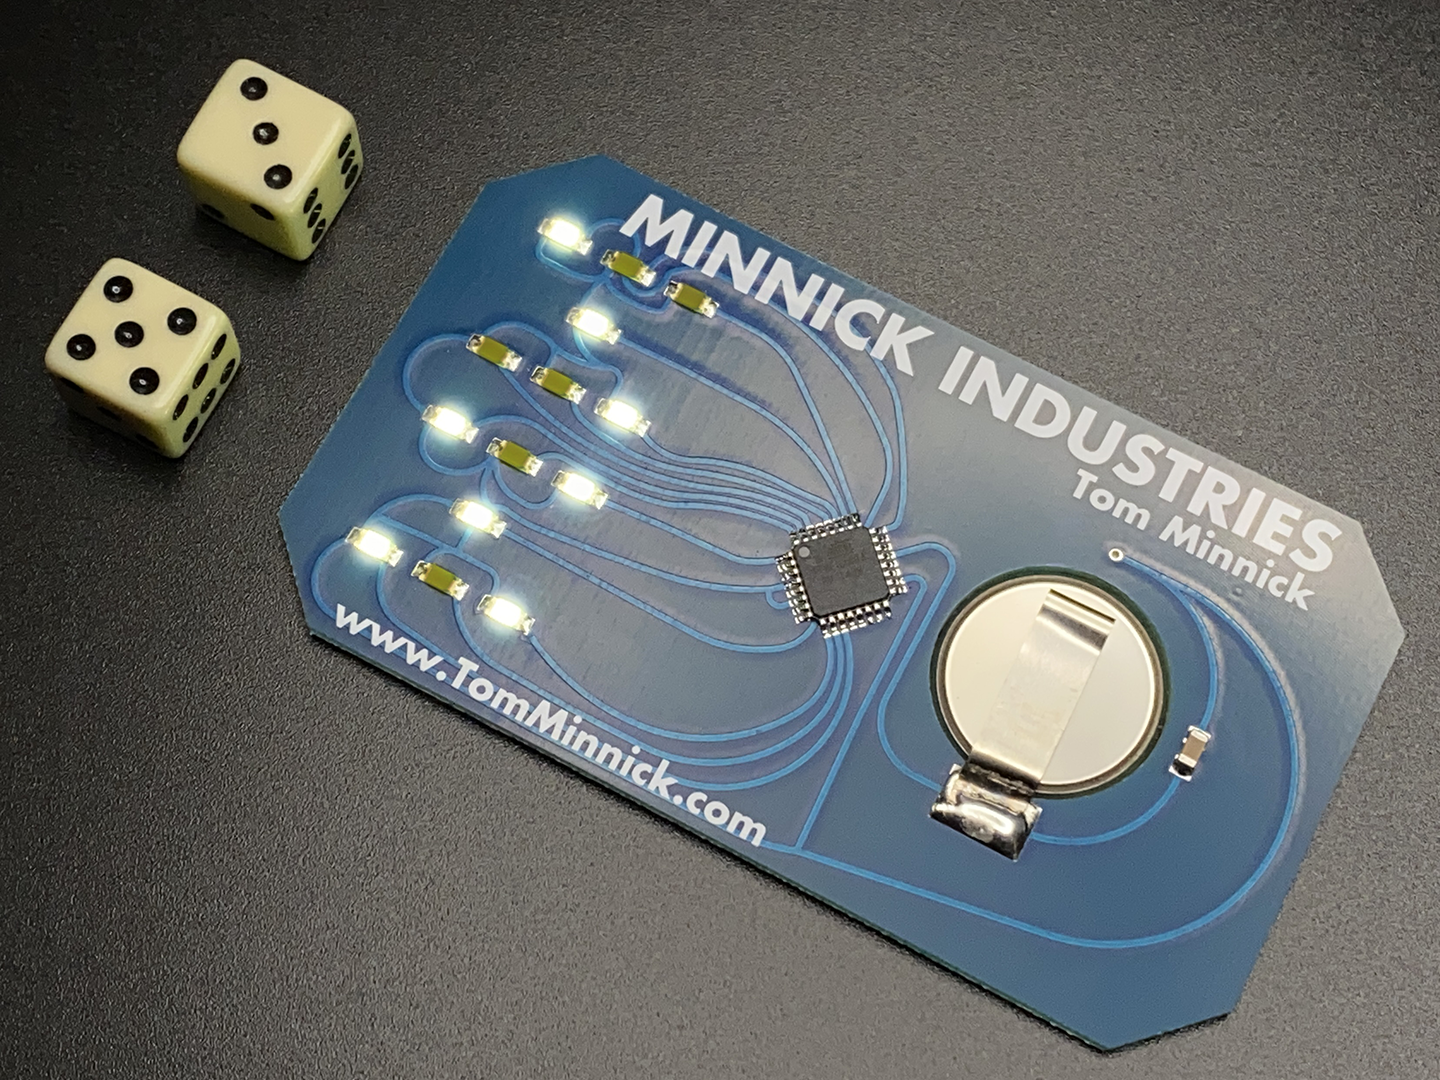
A: Well, as stated above, the primary function is to serve as a contact card, but you may also be wondering about the lights and battery. Well, this is an electronic circuit that when activated "rolls" 2 dice and displays a result. You activate it by pressing and holding the tab. The lights will flash random numbers for a bit and then stop on a final number. It will hold this final number until you release, so be mindful of the non-replaceable battery! See the image below. This is just for fun and to give it a little something extra.
Example result showing a "5" and "3", corresponding real dice shown for illustration.
Q: How good is the "randomness" of the dice?
A: Short answer is not very. You will quickly see the results are not highest quality. This is because I am seeding the PRNG (Pseudo Random Number Generator) by taking an analog input reading off of a pin that isn't connected to anything. This is picking up EMI in the air. This is similar to how those cheap "ghost detectors" work. Unfortunately, in a self-contained little circuit like this, there just isn't a good source of entropy to tap into. There are chips which have true hardware random number generators built in to them for cryptography purposes, however that would drive the cost up for a silly dice card. I say, enjoy it for what it is, a fun novelty, don't use it for your critical rolls in D&D, or DO, I am not here to tell you what to do.
Q: How did you make this?
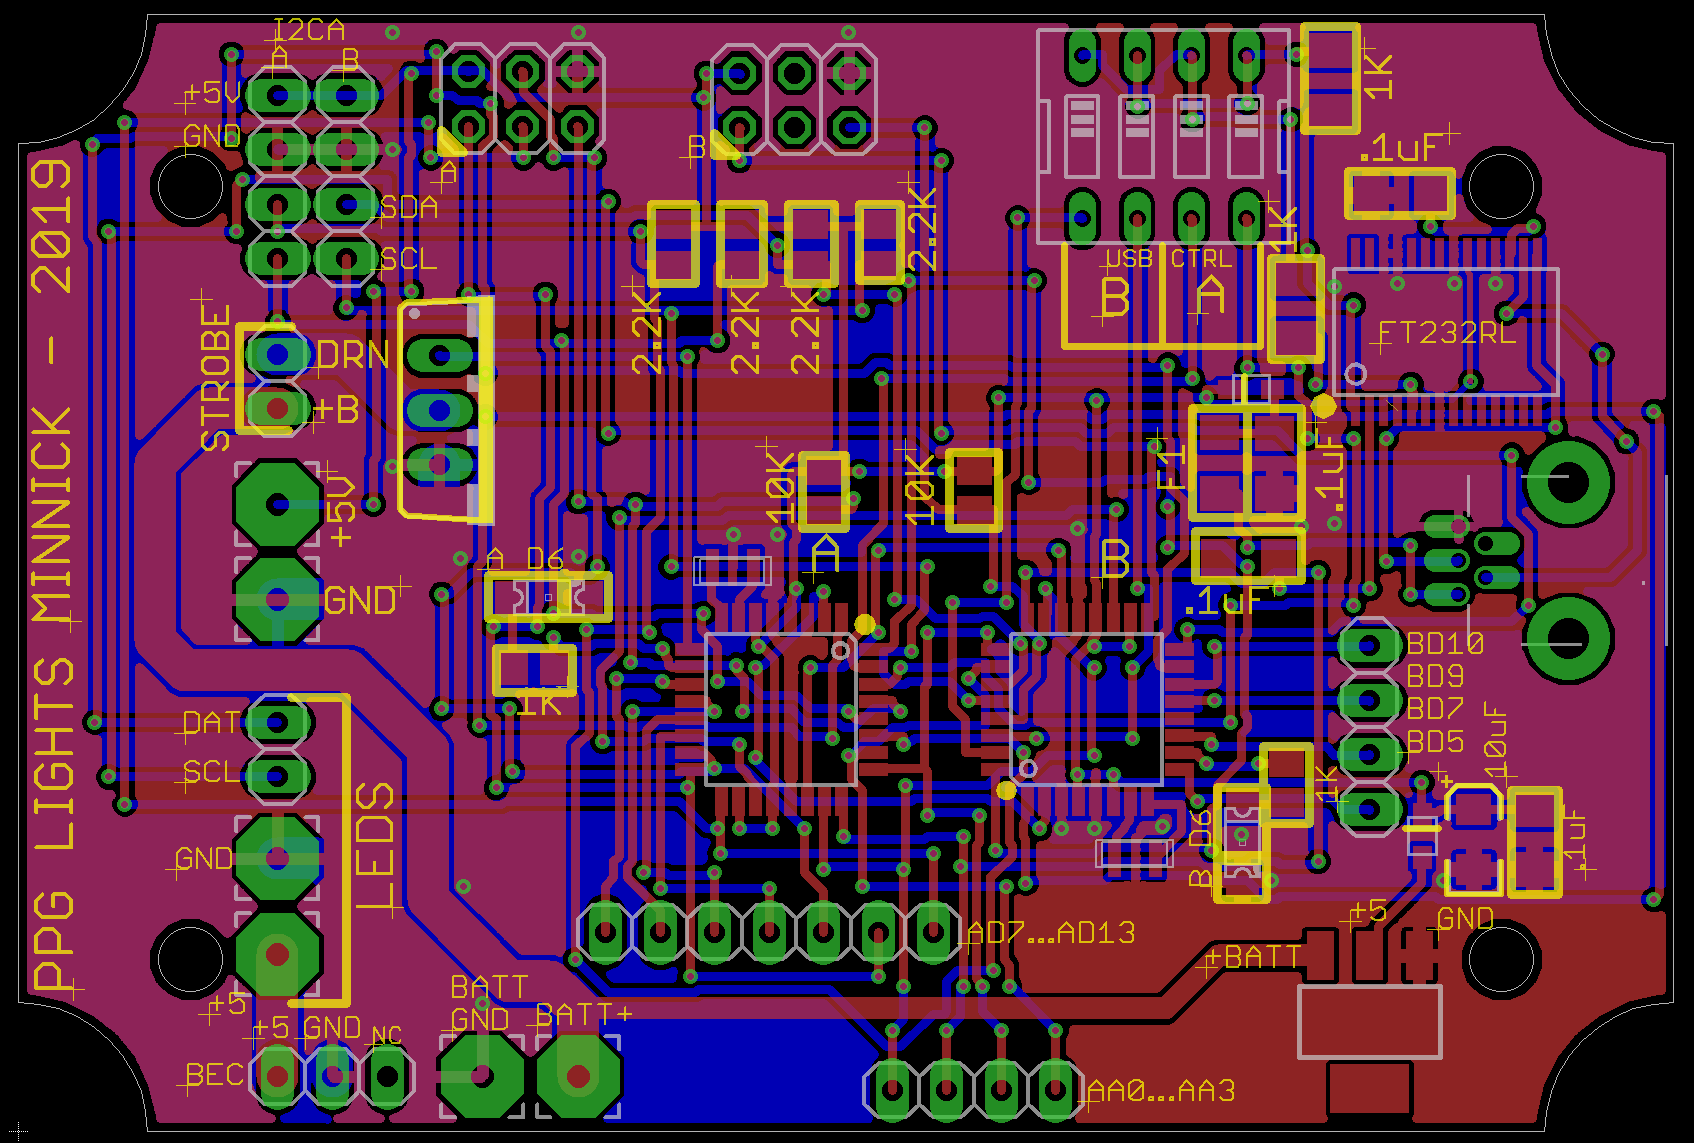
A: This project combines a few different disciplines and as a result was a lot of fun to make. I started by prototyping this on a breadboard to work out the programming portion. At some point in the future, I will publish the source code so you can dissect how it works. After I had working code, I designed the board layout in Eagle Cad. I had the boards made and populated by an overseas board house minus the processor and the battery. When they arrive to me, I flash the chips with the code, solder them on and install the battery. The battery uses spot-welded clips that are soldered in. This was a custom solution; my goal was to make this as low-profile as possible and use minimal components. At some point in the future, I would like to explore making it lower profile by using reverse mounted LEDs and holes in the board.
Q: Why did you make this?
A: I wanted a contact card that was memorable, showcased my interests and skills and was less likely to be discarded by the people I give them to. I wanted it to a convergence of technology and "Art". Plus, it was a fun project to bring into the world.
Q: What is with the weird, curving, non-octagonal traces?
A: This was a conscious decision that actually took a lot more effort than if I had simply gone with a traditional layout. I wanted something different, the thought in my head was that the traces would emerge from the main processor like tendrils from some kind of monster.
Q: Why isn’t the main card square?
A: This was another stylized decision, if science fiction has taught me anything, it’s that hexagons and octagons are the way of the future!
Q: What happens when the battery runs out?
A: Enjoy it for what it was, remember the good times. Alternately, this is a good reason to use the contact info on the card and contact me! If you reach out to me and get it to me, I will replace it!
Q: These must be expensive to make!
A: That is not really a question! But to answer it anyway, they are about $7/per unit in materials. Chip shortage has not helped and also not counting my labor and development time. I certainly don't hand them out as freely as I would paper cards, but I do think of these as being a little more special.
Q: Why is your website not kept up?
A: Why haven't you done YOUR chores?! I do this for fun, and what I have discovered is that I enjoy making things, flying, playing music a lot more than maintaining a website. Sorry, Not Sorry for that. I do update it from time to time when the mood strikes or when I want to document something interesting, but I make no promises as it’s not a main interest of mine. I recommend you follow me on Instagram for more up-to-date happenings in my world which is mostly flying and making things.
Q: Will you make me one with my info on it? or will you make me xyz idea that I have?
A: Short answer is I am sorry, but probably not. Longer answer is, A lot of these projects take many hours to develop and integrate. While I would never say a firm no, the reality is, the amount I would have to charge to make it worth my while likely greatly exceeds what you would be willing to spend. I do these things because I am passionate about exploring ideas and concepts. The minute it becomes a commission job, it robs my soul. That being said, if you are Jeff Bezos or Elon Musk and you want me to make you one, have your people reach out! As The Ghostbusters said "No job is too big, no fee is too big".
Q: …but my idea will change the world and bring fortune and glory!
A: I am sorry, but ideas are a dime a dozen, I can come up with 10 ideas that would change the world over dinner. Ideas are cheap, implementing them is gold. That being said, if you have an idea, hit me up. However just to set expectations 95% of the profit split is in the implementation, marketing, and actual running a business part. Don’t think that your only contribution is the idea and that I am going to labor away tirelessly for hours and hours bringing it to market only to hand over all the benefits and profits to the idea person. Again, it would also help if I am actually interested in it. If you bring me a new idea for a spatula, idk, sounds kind of boring to me, not sure if I would be passionate enough to work on it. That being said, if you are a fellow maker and want to collab, hit me up!
Share Article → ;)
;)
;)
;)
;)
;)
;)
;)
;)

;)
;)
;)